

After some thinking and talking about alternatives, we came to the conclusion that there must be a Starlink on board. Now I have just received the equipment and started it up for the first time and tested that it worked. In this article I share my experiences from that exercise.
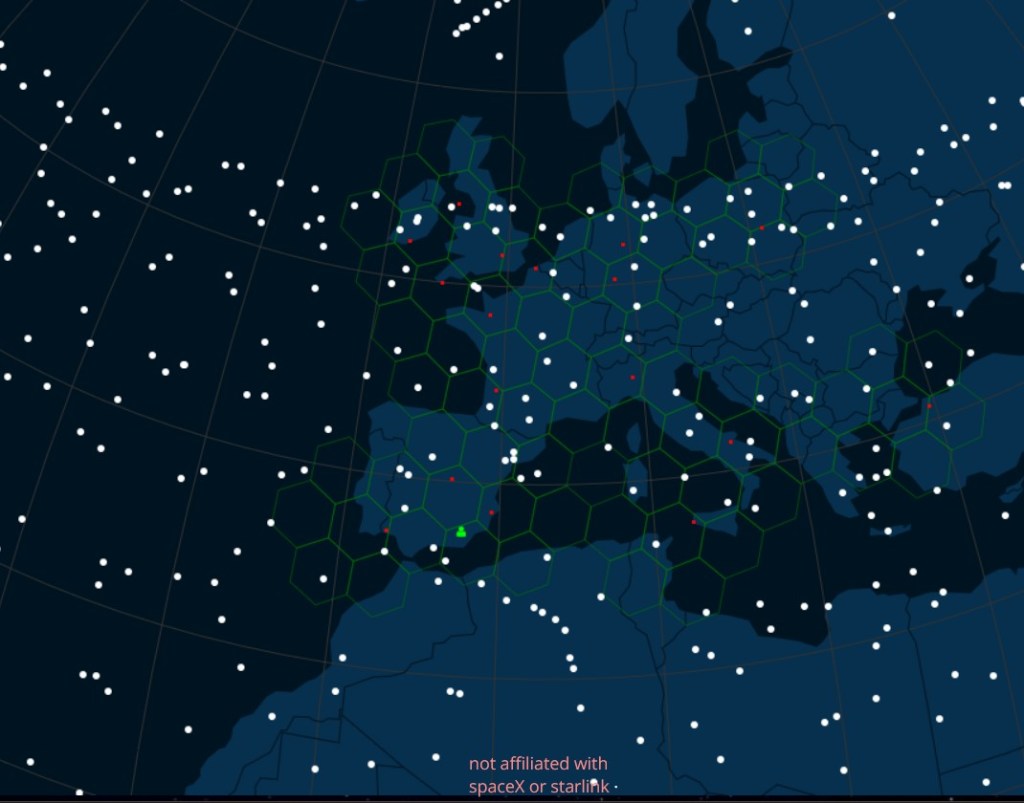
As I wrote in the last article about Starlink, we bought a package called ”Starlink Roam” with the small movable rectangular antenna on the foot (called Standard). We chose the subscription ”Mobile standard” which allows us to use the equipment on the European continent (the area covered by hexagons on their coverage map)

The package contained four parts that were very easy to put together.
Antenna and stand
An antenna and a stand that you had to assemble with a simple hand grip.
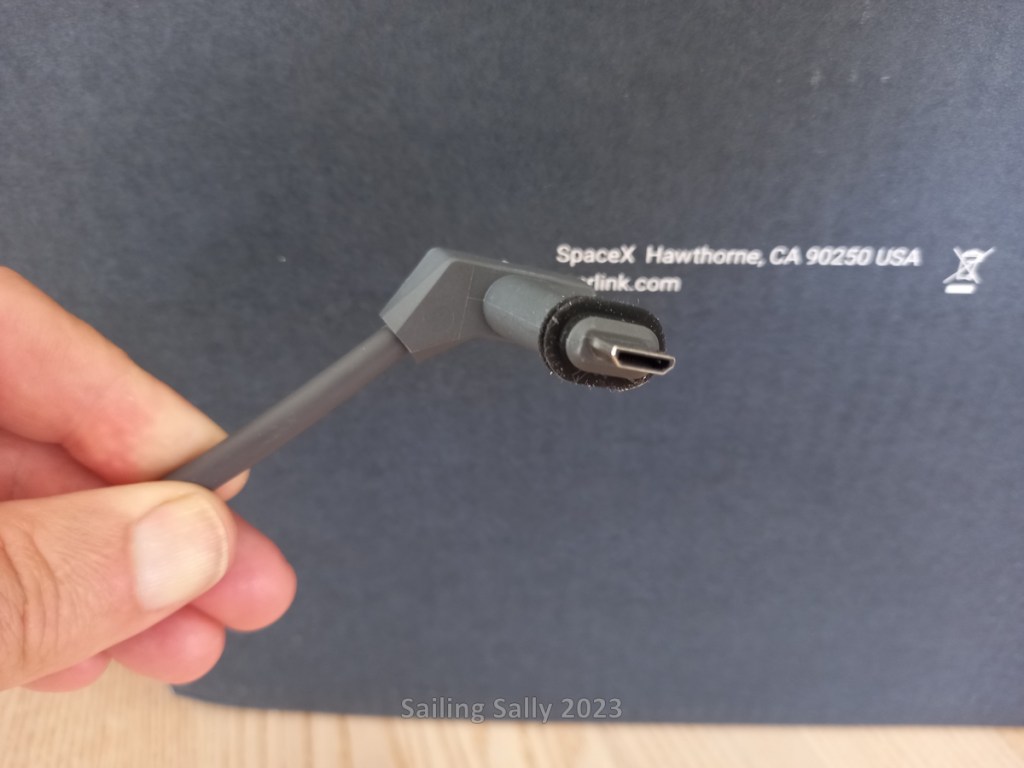
The antenna is equipped with a 15 m long cable with a special connector at the end to be plugged into the router.
The antenna should be placed outdoors with as clear a view of the sky as possible.


Router and cable to power outlet
A router with two sockets at the bottom and a small lamp that lights up when it is connected to the wall socket.
A cable between router and wall outlet that is easily plugged into the router. You should wait to connect the router to the wall outlet until you have done some other things.


Cable dimensioning to Starlink antenna
As a bit knowledgeable in electricity, I am thinking about how the cable and connector can cope with the power that the antenna requires. Especially in slightly colder climates where snow may fall and you need to activate the antenna’s snow melting function. The cable is, after all, a 15 m long network cable that should be able to transmit 75W.
Can you calculate if the cable is coarse enough? Yes, you can.
How do you do it then? Yes, with formulas for calculating cable areas. If you want to know more, please check my article on cable dimensioning where I described how to do it.
In this case, the supply voltage in the cable to the antenna is 48V and we set the maximum power to 75W to have some margin for the snow melting function in the antenna. Furthermore, I assume that the voltage drop must be a maximum of 2.5 V and then I can calculate what resistance the cable must have.
| What | Value | Unit |
| Antenna voltage (U1) | 48 | V |
| Max power (Pmax) | 75 | W |
| Max current (Imax = Pmax/U1) | 1.6 | A |
| Max voltage drop (U2) | 2.5 | V |
| Cable max resistance (Rmax=U2/Imax) | 1.44 | Ohm |
A copper cable has a resistance that depends on how thick it is (diameter) and how long it is. The resistance varies with temperature and increases the hotter it is.
In the table below, I have calculated the cable diameter required to be able to carry over 75W at a few different temperatures and 2x15m = 30 m cable length (you calculate how long the current travels in the cable, i.e. back and forth from the antenna). The cable diameter is calculated as
Diameter of cable = Resistivity * Length cable/Rmax
It then turns out that 15 cable needs to have a cable diameter that is just under 0.4 mm2 to be able to carry over 70W power at 48V voltage with 2.5V maximum voltage drop.
| Temperatur (C) | Resistivitet 1 m (ohm/mm2) | Kabellängd (m) | Kabeldiameter (mm2) |
| 20 | 0.018 | 30 | 0.375 |
| 30 | 0.01872 | 30 | 0.390 |
| 40 | 0.01944 | 30 | 0.405 |
A network cable consists of 8 conductors and normally only four of them are used to transfer data. Each conductor has an area of 0.2 mm2. Starlink has connected this cable so that the 4 four free conductors are used as power cables, two as plus cable and 2 as negative cable. This means that the cable surface is 0.4 mm2 and it is just able to transmit the power that the antenna requires.
The installation
1. Create an account with Starlink
When you buy the equipment, you have the option to create an account and if you do, the antenna will automatically be associated to that account.
2. Associate antenna to account
If you bought the antenna in a different way than via starlink.com, it is time to associate the antenna to the account using a KIT number that is printed on the outside of the box the equipment was delivered in.
3. Install the app for Starlink
Then it’s time to download the app for Starlink, which is available for Android and IPhone, and log into it with your Starlink account.
4. Start the equipment
Now it’s time to start up Starlink for the first time. Make sure the antenna has as good a view of the sky as possible and that the cables are properly plugged into the routers. Then just connect the wall outlet to the router and wait.
For my part, I had to wait 5-10 minutes before the antenna started moving and looking for satellites. In the meantime, you can keep track of the Wi-Fi networks where you are. The router starts up a wifi network up even if there is no connection with satellites yet.
In the equipment currently being shipped, the Wifi network appears to be named ”Stinky” and not Starlink as in the Starlink descriptions. From what I’ve seen online Elon Musk thought it was a way to get people to rename their wifi network, don’t know how true that is.
Connect to the Stinky Wi-Fi network with your phone and you will be prompted to log in. In reality, you will be asked to change the name of the Wi-Fi network as well as enter the password to be used when connecting to the Wi-Fi network with a computer, tablet or phone to access the Internet connection that the router has via satellite.
If you do this in Sweden, there is a good chance that the antenna is aimed towards the south, where the active satellites seem to be for the most part right now.
Problem I had
Before I bought Starlink, I had already created an account and downloaded the app. This caused me to have three problems during startup.
Starlink already associated
When I tried to associate the device with my account, I received a message that the device was already associated with an account. This was because the equipment had already been linked to my account as I created it before purchasing and used the same email both times.

Serviceplan start date incorrect
I discovered the next problem when I got the equipment up and running and connected to the internet with it.
The problem has to do with when you can start paying for the subscription. It says that the subscription starts on the day the equipment is sent from Starlink, but in my case the start date of the subscription was the day I created the account with Starlink. It was almost two weeks before the purchase.
When you start up the equipment for the first time, you have the option to pause the subscription. If you do it within two weeks of the send date, you postpone the start of the subscription until later.
This problem has not been described before. Finally I found a page on the internet that showed how to contact support, see the next section (Contact support) in the article. I sent them a message describing the problem and what I wanted them to help me with. The next day they reply and inform me that there has been an error with them and they are making sure that I don’t have to pay for the subscription until later when I activate it again.
Contact support
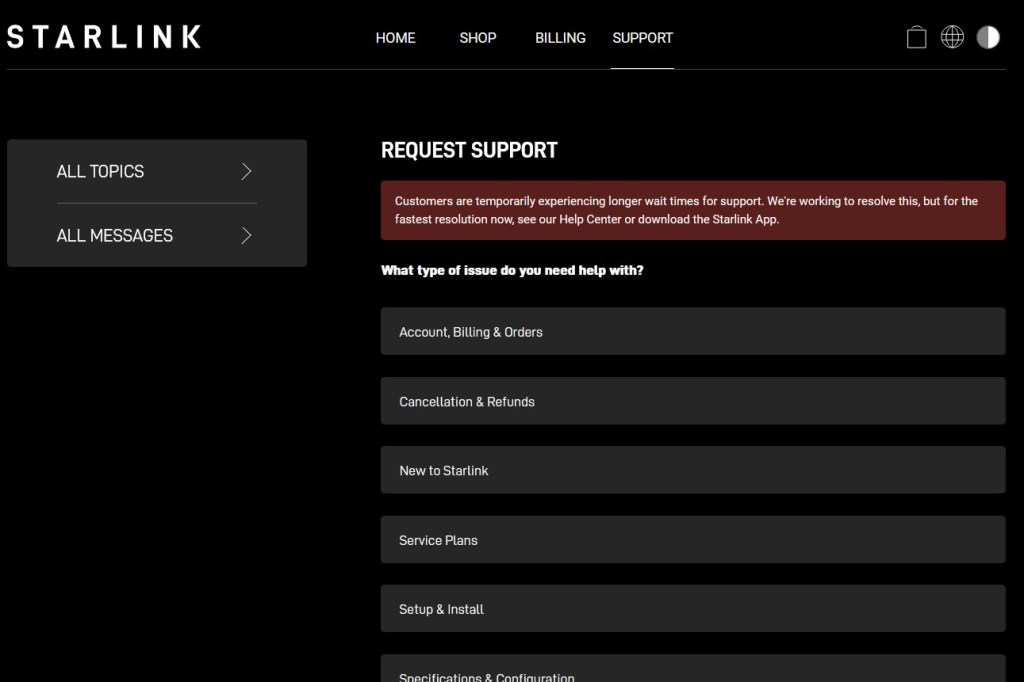
The third problem was how to contact Starlink support to ask them to correct the subscription start date. Finally I managed to find a link to a support page where you could send them a problem description.
To get to the page where you can send a message to support, you first go to this page. Make sure you are logged into your Starlink account in the browser where you access the page. If you’re not, I’m not sure if you can send a message.
Customer Support – Create Ticket – Starlink
First, look through the ready-made questions they have already answered and see if that solves your problem. If it doesn’t, go to a page (where the button to create a message is) and describe your problem. The button only seems to be on pages without any selectable categories.


First boot
After about 10-15 minutes, the equipment had aligned itself and connected to the internet.
I do a speed test and am pleasantly surprised, 136 Mbit/s! This looks promising.

A little about the antenna
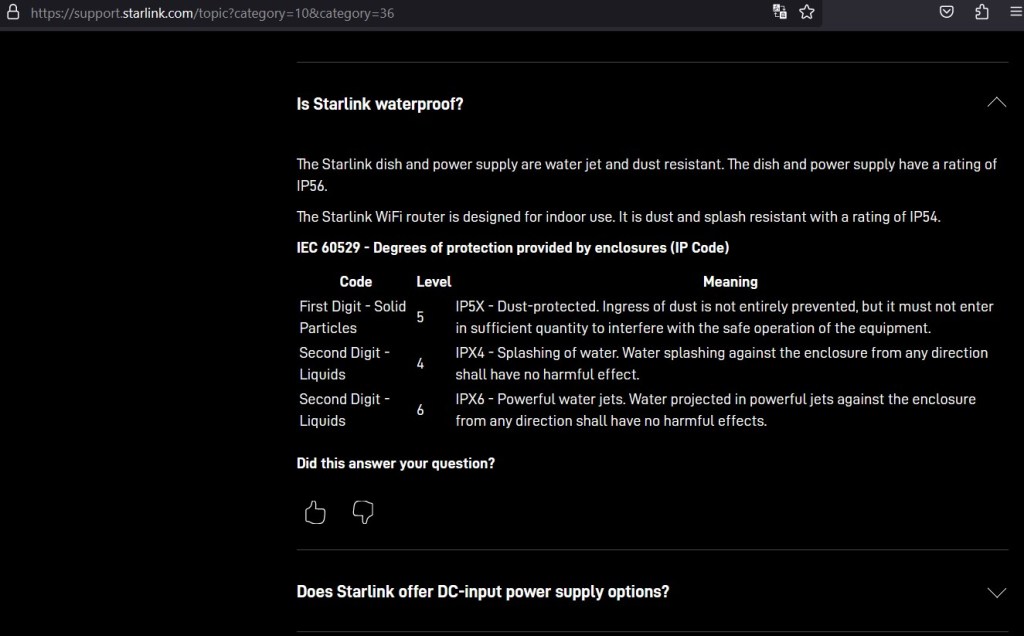
IP rating
When reading about the Starlink Roam and this antenna, it says that the IP rating is IP54, which makes the antenna appear to be a bit sensitive to heavy rain and water spray.
But when I read more about the IP rating of the various parts, it says that it is IP56, i.e. resistant to hard water spray, i.e. the same IP rating as the large fixed antenna intended for maritime use.
Overheated connector/cable
Since the cable has a small margin in terms of how much power it needs to carry, this seems like it could cause problems when it’s cold and you have the snow melt function activated. Then it seems that connectors/cable can get overheated and start to melt.
It is also important that the contacts are pressed in properly. It reduces the risk of moisture getting in and too bad a contact that can destroy the contact. These things cause it to start corroding and the electrical resistance to increase. It will generate heat that can melt surrounding plastic.
There can also be so much bad contact that the electrical signals do not come through. In particular, it seems to apply to the connector in the antenna, see image below.

Next step
The next step for us is to install the antenna on the boat and for now I plan to mount the antenna on the movable stand that is attached to the antenna. I’m keeping the router, so when we’re going to use Starlink, we must have the inverter running. In the long term I would like to replace the router and power supply to the antenna so that it can be connected to the boat’s electrical system for 24V DC. There are slightly different reports about how the mobile antenna works on an anchored or rocking boat. We will wait with conversion to fixed mounting of the antenna until we have experienced for ourselves how it works.
Since the cable for the antenna is specially manufactured by Starlink, it is so far only available to buy in their shop. Let’s see if we get one in reserve or aim to convert to 24V supply.

Du måste vara inloggad för att kunna skicka en kommentar.